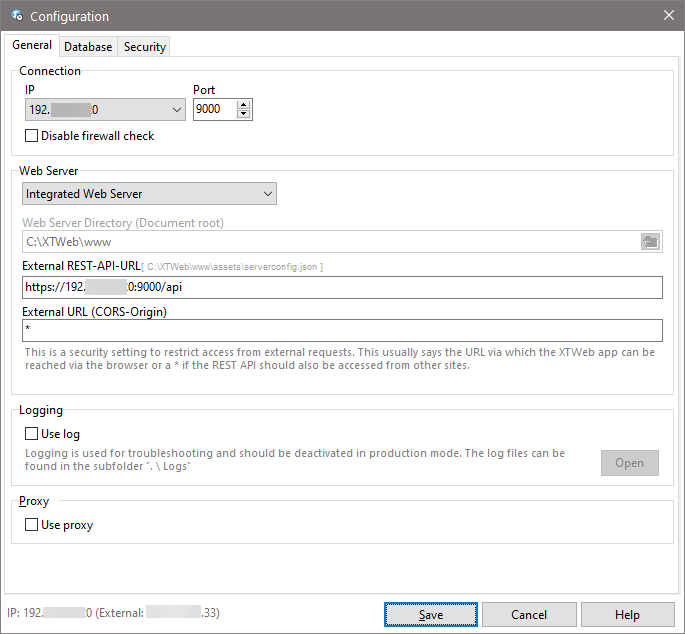
IP-address: Here you select the IP address of the server on which the XTCloudserver is running. Normally the selection "Auto" should work here. If you have more than one network card installed, please select the appropriate IP address.
Port: We have chosen port 9000 as standard. You can assign an individual port number if required.
Deactivate firewall checking: By default, we try to create an exception for the service in the firewall after installing the service. If this is not possible, you must check the box here and manually add the service to your firewall.
Web server: You have the choice to use the web server supplied by us or to use an existing one in your company. If you select the option "Stand-alone web server", the input field for the web server directory becomes active. Enter the path to the root directory there.
If you use your own webserver you need to copy all files from the /www directory of Xpert-Timer to the httpdocs directory of your used webserver (e.g. IIS/Apache).

Next, enter your external REST-api URL. This is the destination address of the web app on the client, which is used to connect to the database (REST server). This is usually an external IP address or URL. For pure use on the intranet, this can also be an internal network address. You can also use a URL instead of an IP address.
Proxy: Enable this option and enter the details of your proxy server, if used in your company.
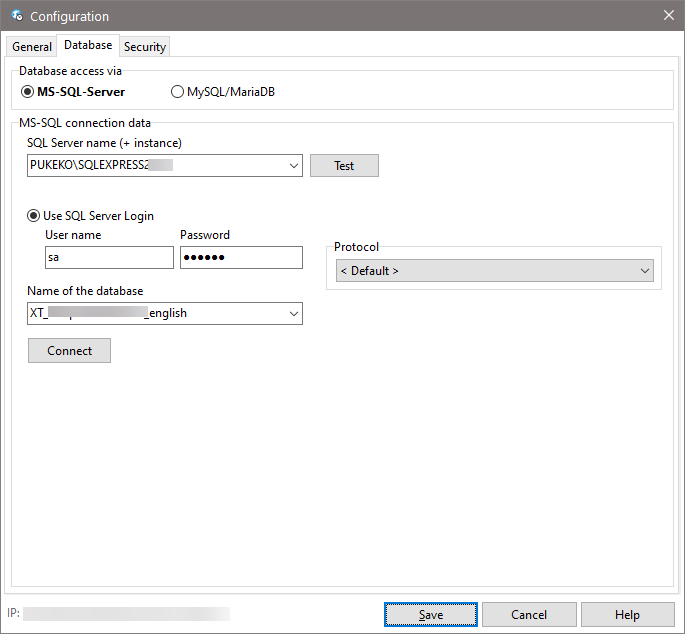
Database: Select your database format here and enter the corresponding connection data to your central database.
MS-SQL: Note that you must log in with the user name and password to start the service. Login via the Windows authentication is not possible at this point.

SSL: We recommend using SSL to encrypt all data. If you have your own certificate for your company, you can enter your data here. If you do not have your own certificate, XTCloudserver will provide you with a certificate. However, the browser still displays the URL as insecure and you must manually click away the security warning.
When creating the certificate, you will be asked for a password, which will then be automatically entered in the password field. If you have problems when starting the service, it is best to create a new certificate again.
View the certificate to ensure that the entered path to the certificate is accessible from the program.
Security: You should use the automatic logout from the web application so that the users have to log in again and again to the system.
Example Case:
Employee Maier always works with the XTWeb. He leaves the company. Although you set the user to "Inactive" in the Xpert-Timer for Windows, the user can still work with the Xpert Timer in the browser as long as he does not have to log in again.
As soon as he is automatically logged out, he will not be able to log in to the system.
API-Key necessary: If you want to connect another application via the REST server, you need an API key for this. You can create this here and use it for your interface.